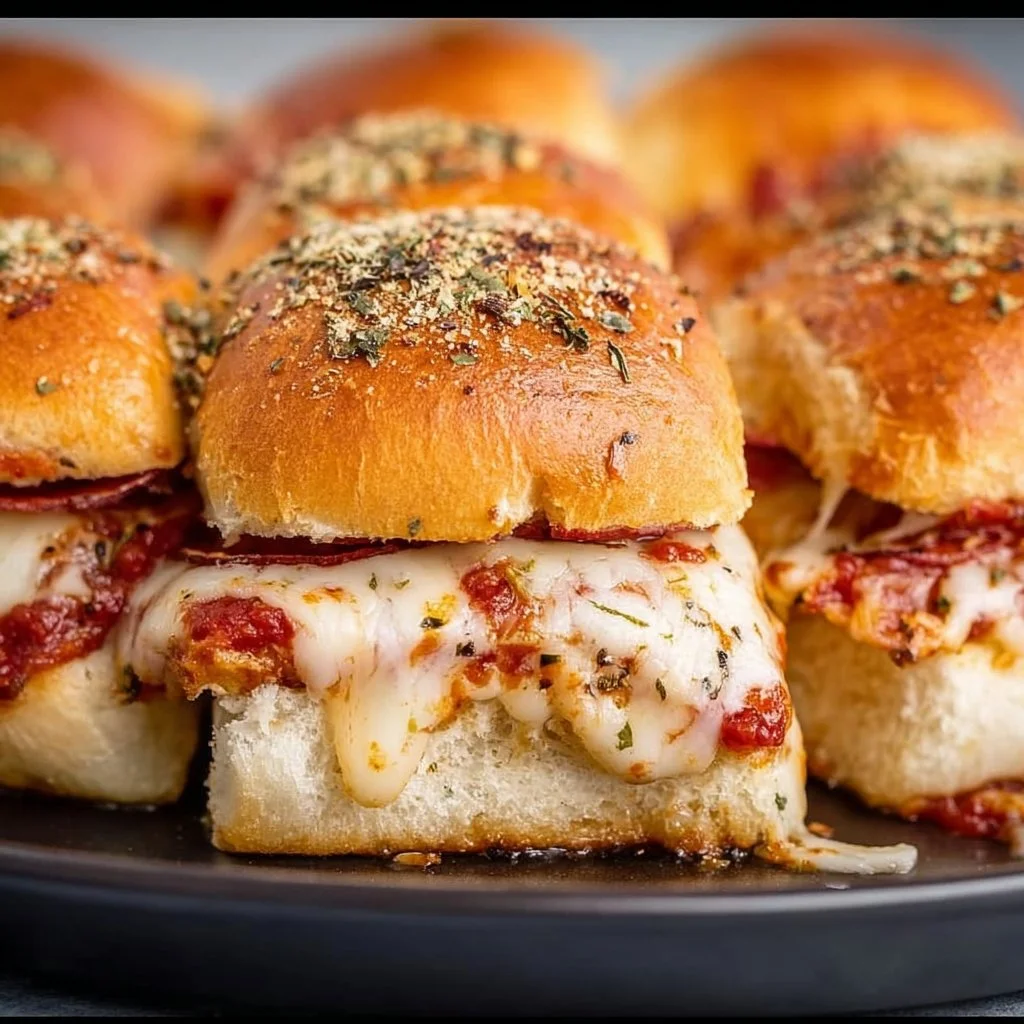
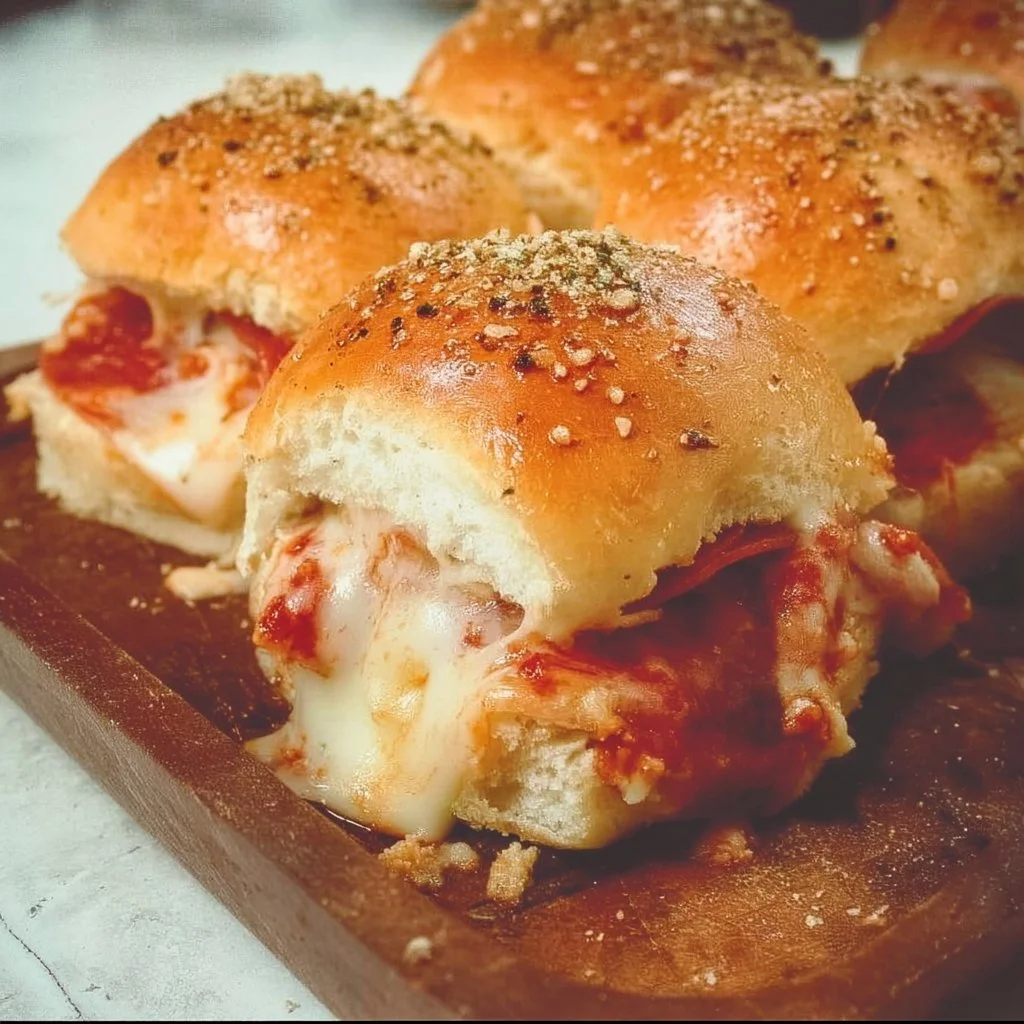
Pizza Sliders: An Irresistible Bite of Flavor
Ever craved pizza but didn’t want to deal with the hassle of making a whole pie? Enter Pizza Sliders: tiny bundles of cheesy goodness, stacked with all your favorite pizza toppings and hugged by sweet Hawaiian rolls. They’re like mini pizza parties you can eat with your hands—who wouldn’t want that?
These sliders are quick, fun, and come together in just one pan! Plus, they’re perfect for game nights, parties, or whenever the pizza craving strikes. Let’s dive into why these little gems should be on your dinner table soon!
Why Make This Recipe
Why settle for boring snacks when you can whip up these Pizza Sliders that make everyone smile?
- Easy Cleanup: Who wants to spend hours in the kitchen scrubbing pans? With these sliders, you’ll only need one dish, leaving you with more time to kick back and enjoy.
- Family-Friendly: These sliders are a hit with kids and adults alike. They’re customizable, so picky eaters can load up on their favorite toppings while adventurous eaters can get creative!
Ingredients
You don’t need fancy stuff—just these basics!
- 12 Hawaiian rolls
- 1 cup mozzarella cheese, shredded
- 1/2 cup pepperoni slices
- 1/2 cup pizza sauce
- 1/4 cup green bell pepper, chopped
- 1/4 cup onion, chopped
- Olive oil (for brushing)
- 1 teaspoon Italian seasoning
Directions
Ready to turn your kitchen into a pizza haven? Follow these easy steps:
- Preheat the oven to 350°F (175°C).
- Slice the Hawaiian rolls in half to create top and bottom halves.
- On the bottom half of the rolls, layer mozzarella cheese, pepperoni, pizza sauce, green bell pepper, and onion.
- Place the top half of the rolls back on.
- Brush the tops with olive oil and sprinkle with Italian seasoning.
- Bake in the oven for 10-15 minutes, or until the cheese is melted and the tops are golden.
- Remove from the oven, slice, and serve warm.
How to Make Pizza Sliders (Overview)
Making these sliders is as easy as pie—wait, no, easier!
- Layer it up: You start by prepping the rolls and piling on all that cheesy goodness.
- Brush & Bake: A quick glaze of olive oil and a sprinkle of Italian seasoning gives those toes a golden allure.
- Slice and Serve: Let the tantalizing aroma fill your home, then slice ‘em up and dig in!
Pro tip: Don’t skip the olive oil glaze—it’s what turns the tops into a crunchy, irresistible layer.
How to Serve Pizza Sliders
Serving these Pizza Sliders can be just as fun as making them!
- Platter It Up: Serve on a colorful plate for a pop of color.
- Dipping Sauces: Pair them with extra pizza sauce or even some ranch for that extra punch.
- Crunch Factor: Serve with a side of crispy fries or a fresh, vibrant salad for a delicious contrast.
The combination of gooey cheese, your favorite toppings, and those soft rolls will have your mouth watering before they even hit the table!
How to Store Pizza Sliders
Want to save leftovers? These sliders stay fresh in the fridge for about 3-4 days.
- For longer storage, pop them in the freezer! Just wrap them tightly, and they’ll keep for a month.
- To reheat, just toss them in the oven until warmed through—nobody likes a cold slider!
Tips to Make Pizza Sliders
Here are a few insider tricks to elevate your slider game:
- Customize: Feel free to swap out pepperoni for veggies or another protein—you do you!
- Extra Cheese: Can you ever have too much cheese? I think not! Add a bit more for that melty goodness.
- Use Fresh Herbs: A sprinkle of fresh basil or oregano before serving takes these to the next level.
- Don’t Overbake: Keep an eye on them; nobody likes dry sliders!
Variations
Want to switch it up? Here are a few easy ideas:
- Veggie Delight: Use mushrooms, spinach, or olives for a meatless version.
- Spicy Kick: Add some jalapeños or a spicy marinara sauce for those who like it hot!
- Vegan Twist: Swap cheese for a vegan alternative and use plant-based pepperoni.
FAQs
1. Can I make these sliders ahead of time?
Absolutely! You can assemble them and store them in the fridge before baking. Just add a few extra minutes to the baking time.
2. Can I freeze Pizza Sliders?
Yes! Wrap them tightly and freeze for up to a month. Reheat directly from the freezer or thaw overnight before baking.
3. What can I substitute for Hawaiian rolls?
Any soft bread rolls work! You can use slider buns or even ciabatta if you prefer a bit more crunch.
Now you’re all set to create your very own Pizza Sliders! 🥳 Enjoy every bite of these tasty treats!
📌 Pin this recipe for your next cozy dinner night!
Pizza Sliders
Ingredients
Method
- Preheat the oven to 350°F (175°C).
- Slice the Hawaiian rolls in half to create top and bottom halves.
- On the bottom half of the rolls, layer mozzarella cheese, pepperoni, pizza sauce, green bell pepper, and onion.
- Place the top half of the rolls back on.
- Brush the tops with olive oil and sprinkle with Italian seasoning.
- Bake in the oven for 10-15 minutes, or until the cheese is melted and the tops are golden.
- Remove from the oven, slice, and serve warm.