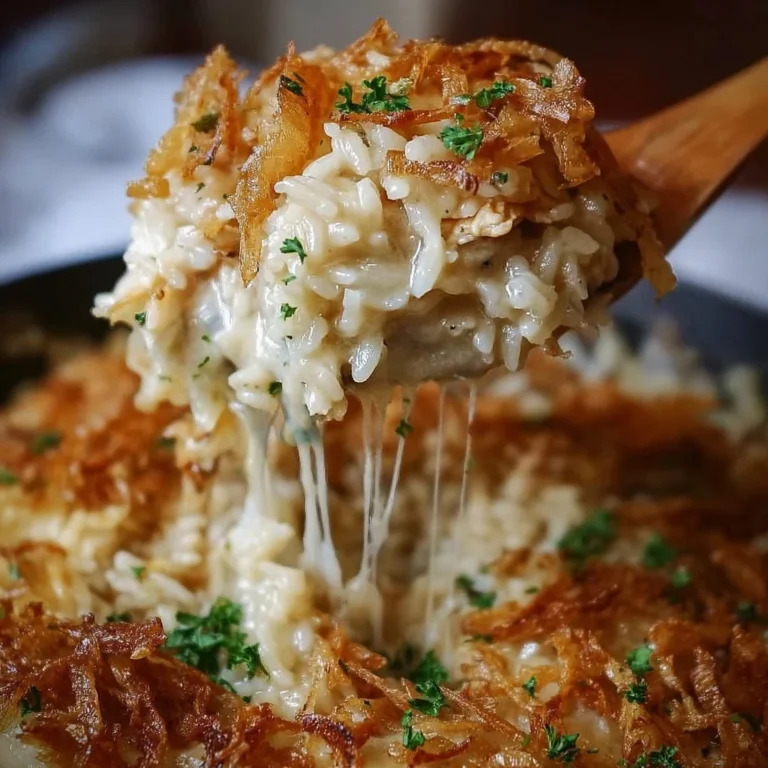
Warm, gooey bites of cheeseburger heaven await you!
Imagine biting into a golden bomb of cheesy goodness that bursts with the flavor of a juicy cheeseburger. These Garlic Parmesan Cheeseburger Bombs make all your comfort food dreams come true. They’re super quick, satisfying, and perfect for any occasion — whether it’s game night, a cozy dinner, or just because you’re feeling a lil’ snacky.
Why make this recipe
Why put off tasty happiness? Here are a couple of reasons you’ll love these cheeseburger bombs:
- Easy cleanup: Say goodbye to messy kitchens! These little morsels come together in one pan, which means less time scrubbing and more time enjoying your delicious creation.
- Family-approved: Kids and adults alike will devour these bites! They’re fun to make and even more fun to eat. Who doesn’t love a meal that gets everyone around the table?
Ingredients
You don’t need fancy stuff — just these basics!
- 1 lb ground beef
- 1 cup shredded cheese (cheddar or mozzarella)
- 1/4 cup grated Parmesan cheese
- 1/2 cup garlic butter
- 1 can refrigerated biscuit dough
- Salt and pepper to taste
- Optional: chopped parsley for garnish
Directions
Ready to dive in? Let’s get cooking with these simple steps:
- Preheat the oven to 375°F (190°C).
- In a skillet, cook the ground beef over medium heat until browned. Season with salt and pepper, then drain any excess fat.
- Stir in the shredded cheese and Parmesan cheese until melted and combined. Yum!
- Roll out the biscuit dough and cut it into larger pieces. Place a spoonful of the beef and cheese mixture in the center of each piece.
- Fold the dough over and pinch to seal, shaping them into bombs.
- Brush the tops with garlic butter and place them on a baking sheet lined with parchment paper.
- Bake in the preheated oven for 15-20 minutes or until golden brown.
- Serve warm, optionally garnished with chopped parsley.

How to make Garlic Parmesan Cheeseburger Bombs (Overview)
It’s like the ultimate cooking hack! Start by cooking that ground beef to perfection — it’s all about getting those tasty flavors out. Mix in the cheeses until everything turns melty and irresistible. While the cheese does its thing, prepare your biscuit dough, fill, pinch, and bake. Seriously, it’s so easy! Pro tip: Don’t skip toasting the garlic in the butter, as it elevates the flavor to a whole new level. Trust me!
How to serve Garlic Parmesan Cheeseburger Bombs
These cheeseburger bombs are party-ready! Serve them up with a side of spicy ketchup or creamy ranch dressing for dipping. Picture this: golden, crunchy on the outside and ooey-gooey on the inside. The aroma of garlic and cheese wafts through the air, making them impossible to resist. You might need to make a double batch — just sayin’!
How to store Garlic Parmesan Cheeseburger Bombs
If you have any leftovers (but let’s be real, who will?), these keep well in the fridge for about 3 days. Just pop them in an airtight container. Want to enjoy them later? Freeze for up to 3 months! Reheat in the oven at 350°F (175°C) until warmed through for that fresh-out-of-the-oven taste.
Tips to make Garlic Parmesan Cheeseburger Bombs
Here are some insider tricks to level up your cheeseburger bomb game:
- Make ahead: Prepare the filling in advance and assemble right before baking!
- Ingredient swaps: Try ground turkey or chicken for a leaner option or mix in some sautéed onions for added flavor.
- Texture tip: Don’t overwork the biscuit dough; keep it tender and flaky for the best bites.
Variations
Want to shake things up a bit? Here are a few ideas:
- Go vegan by substituting the beef with your fave plant-based ground meat and using dairy-free cheese.
- Spice things up with jalapeños or Sriracha for a kick!
- Consider adding fresh herbs like basil or cilantro for a refreshing twist.
FAQs
Can I make these in advance? Absolutely! Prep the filling and assemble them beforehand, then bake when you’re ready.
What cheese can I use? You can swap out cheddar for any cheese you love — mozzarella or pepper jack work beautifully too!
Can I freeze these bombs? Yes! Freeze them after baking, then reheat directly in the oven when you’re ready to snack.
📌 Pin this recipe for your next cozy dinner night!

Garlic Parmesan Cheeseburger Bombs
Ingredients
Method
- Preheat the oven to 375°F (190°C).
- In a skillet, cook the ground beef over medium heat until browned. Season with salt and pepper, then drain any excess fat.
- Stir in the shredded cheese and Parmesan cheese until melted and combined.
- Roll out the biscuit dough and cut it into larger pieces.
- Place a spoonful of the beef and cheese mixture in the center of each piece.
- Fold the dough over and pinch to seal, shaping them into bombs.
- Brush the tops with garlic butter and place them on a baking sheet lined with parchment paper.
- Bake in the preheated oven for 15-20 minutes or until golden brown.
- Serve warm, optionally garnished with chopped parsley.