Ready for a flavor explosion wrapped in deliciousness?
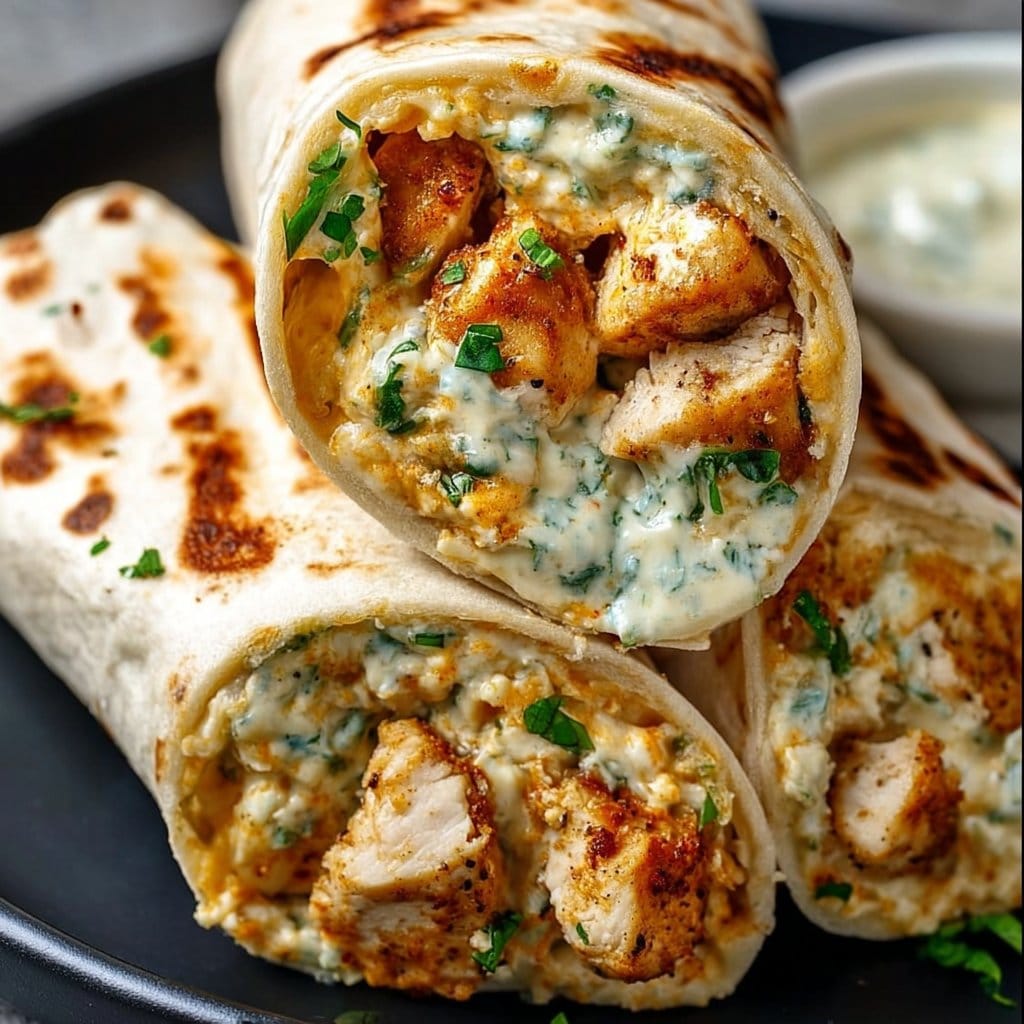
Picture this: warm, crispy tortillas cradling tender, cheesy chicken mixed with a dreamy garlic aioli. If your taste buds are tingling, you’re in for a treat with these Cheesy Garlic Chicken Wraps! This easy, one-pan recipe comes together in a flash, making it perfect for busy weeknights or impromptu gatherings. Trust me; your friends and family will be begging for your secret after the first bite!
Why make this recipe
Who doesn’t love a recipe that’s simple, delicious, and requires minimal cleanup? These Cheesy Garlic Chicken Wraps check all the boxes:
- Quick to prepare: You can whip these up in under 30 minutes! That’s less time than it takes to scroll mindlessly through your social feed.
- Kid-friendly: Everyone loves cheese, especially when it’s melted! Even the pickiest eaters will find it hard to resist these wraps.
- Versatile and fun: Perfect for lunch or dinner, they also double as a party pleaser. Just imagine serving these at your next gathering—major host points!
Ingredients
You don’t need fancy stuff — just these basics!
- 2 cups cooked chicken (shredded)
- 1/2 cup garlic aioli
- 1 cup cheddar cheese (shredded)
- 4 large tortillas
- Salt and pepper to taste
Directions
Let’s get cooking! Follow these simple steps:
- In a large mixing bowl, combine the shredded chicken and garlic aioli. Mix until everything is well coated.
- Stir in the shredded cheddar cheese and add salt and pepper to taste.
- Lay a tortilla on a flat surface. Spoon a generous amount of the cheesy chicken mixture into the center.
- Roll up the tortilla, folding in the sides to secure the filling. Repeat with the remaining tortillas.
- Heat a non-stick pan over medium heat. Place the wraps seam-side down in the pan and cook until golden brown, about 2-3 minutes per side.
- Slice in half and serve!
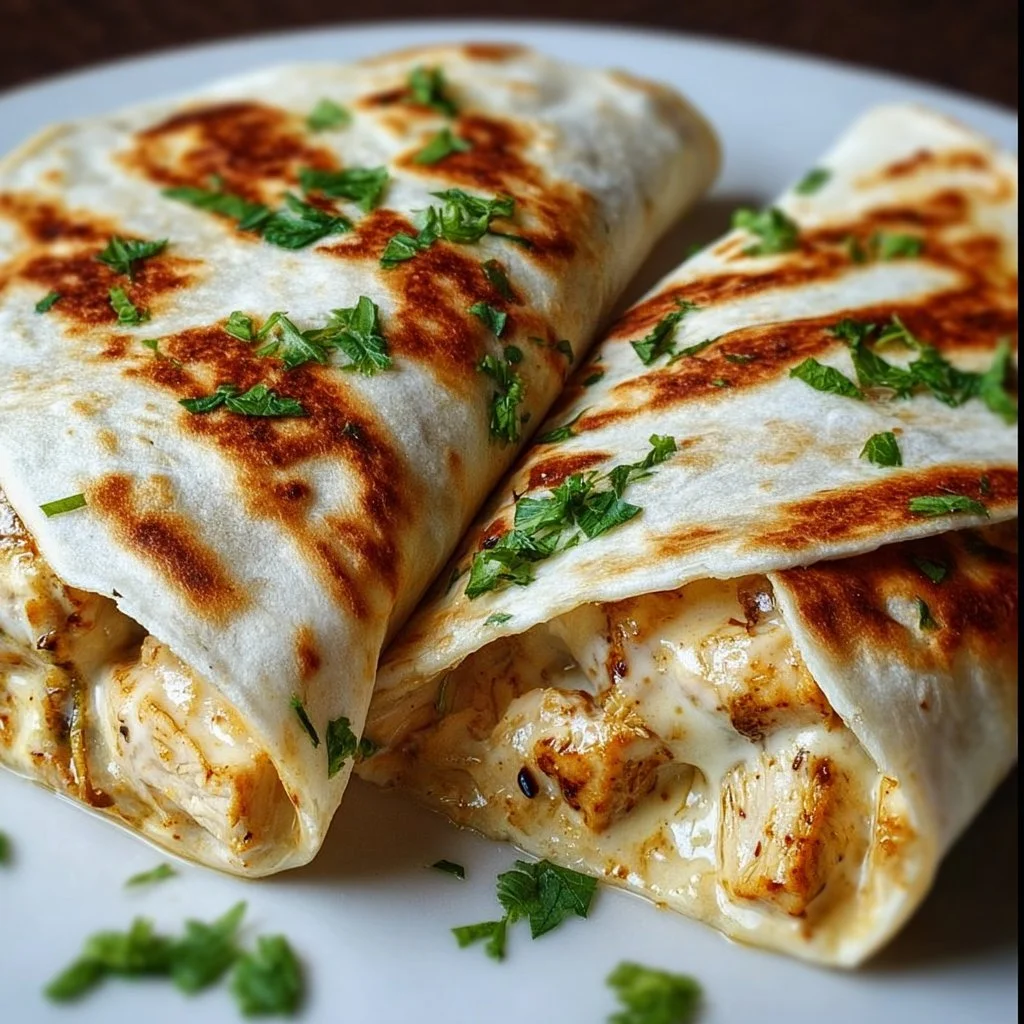
How to make Cheesy Garlic Chicken Wraps (Overview)
Making these wraps is like assembling your favorite sandwich but on a whole new level! First, you’ll mix up those juicy chicken and garlic flavors, then wrap it up in a tortilla that crisps beautifully in the pan. Pro tip: don’t skip toasting the garlic aioli mixture—it develops a rich flavor that’ll elevate this wrap from good to GREAT!
How to serve Cheesy Garlic Chicken Wraps
Serve these wraps with a side of crispy fries or a fresh salad for a balanced meal. You can also drizzle some extra garlic aioli on top or sprinkle some chopped herbs to add color and freshness. The melted cheese and warm tortilla create a heavenly aroma that’ll have everyone diving in for seconds—who could resist that?
How to store Cheesy Garlic Chicken Wraps
These wraps keep well in the fridge for up to 3 days, so feel free to enjoy leftovers! Just make sure to place them in an airtight container. If you want to save them for longer, you can freeze them for up to a month. To reheat, pop them in a skillet on low heat until warmed through and crispy again. Trust me, soggy wraps are not the way to go!
Tips to make Cheesy Garlic Chicken Wraps
- Swap the protein: You can easily replace the chicken with turkey or even shredded beef if you’re feeling adventurous.
- Cheese it up: Experiment with different cheeses like Monterey Jack or pepper jack for a spicy kick!
- Add veggies: Toss in some sautéed bell peppers or spinach for a fresh twist. After all, who said wraps can’t be healthy, right?
- Meal prep: You can make the cheesy filling ahead of time. Just roll it up when ready to cook, and you’ll be set for a quick dinner!
Variation
Feeling adventurous? Try making these wraps vegan by using shredded jackfruit instead of chicken and swapping out the cheese for a plant-based option. Craving more flavor? Add your favorite sauces or spices for an extra zing!
FAQs
Can I use leftover chicken for this recipe?
Absolutely! Leftover rotisserie chicken works great here and adds an extra layer of flavor.
How can I make these wraps ahead of time?
Prep the filling and store it in the fridge. Assemble the wraps right before cooking for the best texture.
Can I freeze the wraps?
Yep! Just freeze them before cooking. When you’re ready to enjoy, thaw and then cook them directly from frozen, but note that cooking time will be longer.
📌 Pin this recipe for your next cozy dinner night!
Cheesy Garlic Chicken Wraps
Ingredients
Method
- In a large mixing bowl, combine the shredded chicken and garlic aioli. Mix until everything is well coated.
- Stir in the shredded cheddar cheese and add salt and pepper to taste.
- Lay a tortilla on a flat surface. Spoon a generous amount of the cheesy chicken mixture into the center.
- Roll up the tortilla, folding in the sides to secure the filling. Repeat with the remaining tortillas.
- Heat a non-stick pan over medium heat. Place the wraps seam-side down in the pan and cook until golden brown, about 2-3 minutes per side.
- Slice in half and serve.