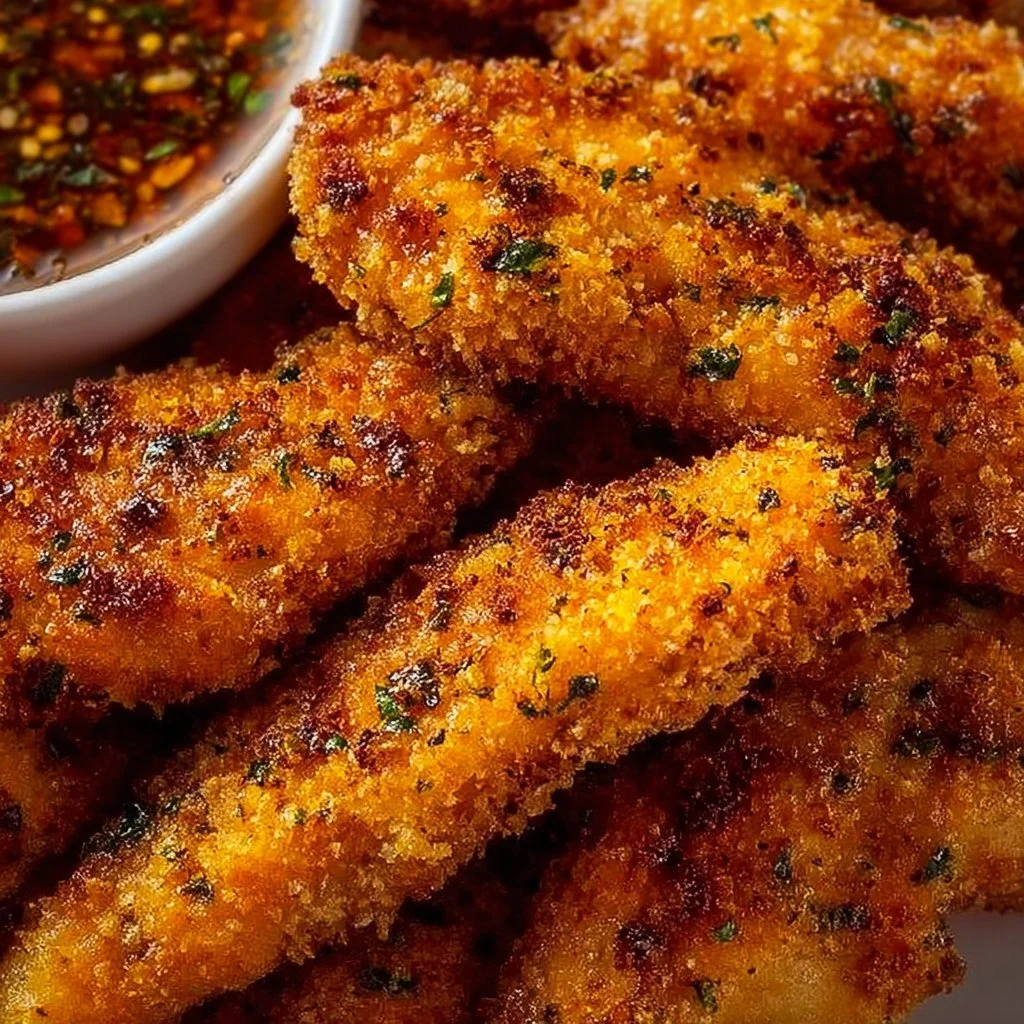
Get Ready for a Crunchy Delight!
Ever craved that perfect crispy texture that only chicken tenders can deliver? These Gluten Free Chicken Tenders are not only super crunchy but also incredibly easy to make at home! The golden-brown crust pairs perfectly with any dipping sauce you can dream up. Plus, they are a hit with kids and adults alike, making them a fantastic addition to any dinner table.
Reasons to Love This Recipe
Why should you whip up these delightful tenders tonight? Well, for starters, they’re easy to prepare—no culinary degree required! You can say goodbye to complicated dinner prep. And let’s be real, who doesn’t love a dish that requires minimal cleanup? Just one bowl for the flour, one for the eggs, and one for the breadcrumbs. Voila!
Plus, they fit the bill for family-friendly meals. Think about it: crispy, juicy chicken that can satisfy even the pickiest eaters. Your kids will savor every bite—and maybe even ask for seconds! 🍗
Ingredients
You don’t need fancy stuff — just these basics!
- 1 lb chicken tenders
- 1 cup gluten free all-purpose flour
- 1 tsp garlic powder
- 1 tsp paprika
- 1/2 tsp salt
- 1/2 tsp black pepper
- 2 large eggs
- 1 cup gluten free breadcrumbs
- Cooking oil for frying (such as avocado or vegetable oil)
Directions
Let’s get cooking! Follow these simple steps to crispy goodness:
- In a shallow bowl, combine gluten-free flour, garlic powder, paprika, salt, and black pepper.
- In a separate bowl, beat the eggs until smooth.
- Place gluten-free breadcrumbs in a third bowl.
- Dip each chicken tender first into the flour mixture, then into the beaten eggs, and finally coat with the breadcrumbs.
- Heat oil in a skillet over medium heat.
- Fry the chicken tenders for 3-4 minutes on each side or until golden brown and cooked through.
- Place cooked tenders on a paper towel-lined plate to drain excess oil.
- Serve hot with your favorite dipping sauce.
How to Make Gluten Free Chicken Tenders (Overview)
So, what’s the process, you ask? Grab your bowls and get ready to dip! You start by creating a flavorful coating—a blend of gluten-free flour and spices to make every bite pop. Next, you’ll dunk those tenders in egg and coat them with breadcrumbs for an irresistible crunch. Pro tip: Letting the oil heat properly is crucial; you want an sizzle when those tenders hit the pan.
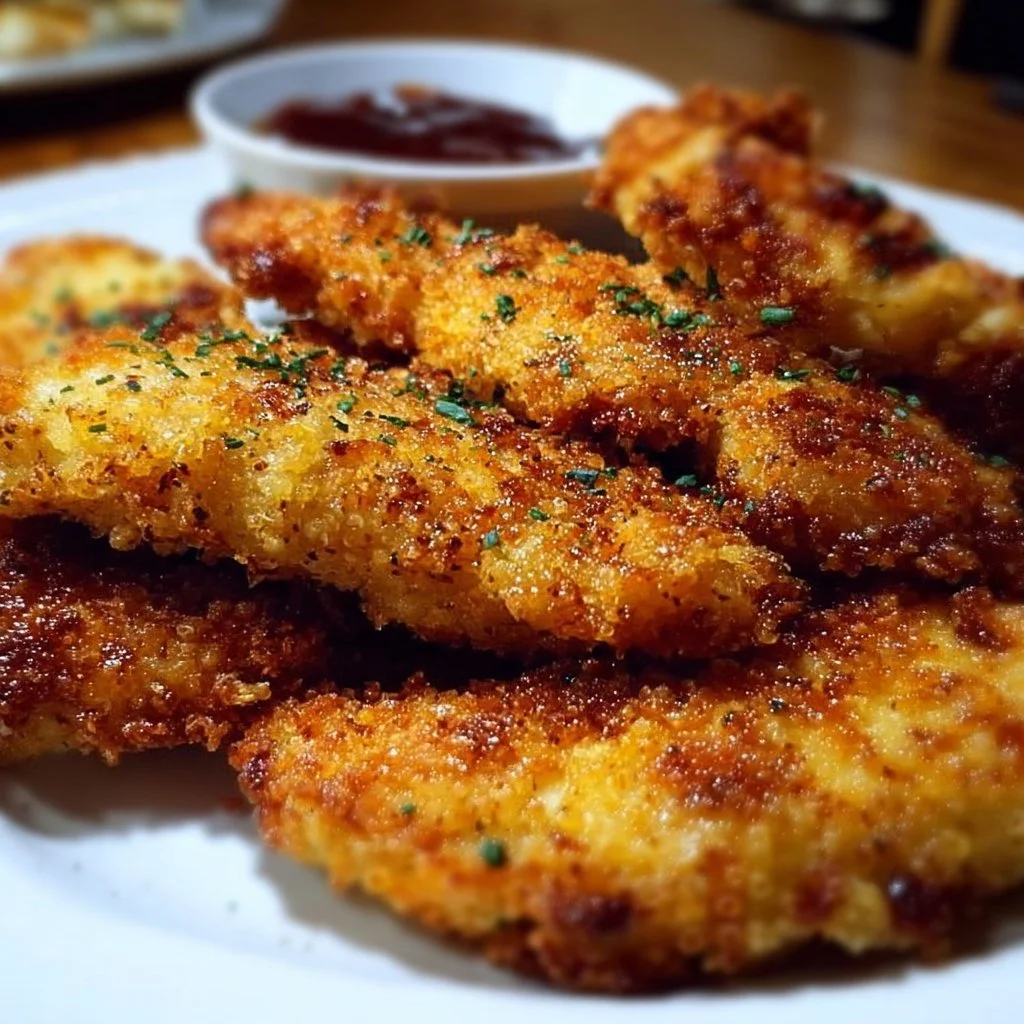
How to Serve Gluten Free Chicken Tenders
You can’t go wrong serving these tenders with a variety of dips. Think creamy ranch, zesty BBQ, or even tangy honey mustard. The colorful plating of golden tenders alongside a vibrant dipping sauce is an absolute feast for the eyes. And don’t forget about sides! Crispy fries or a fresh salad can add a wonderful contrast to the tender’s crunch. Your kitchen will smell amazing, trust me!
How to Store Gluten Free Chicken Tenders
These tenders will stay fresh in the fridge for up to 3 days. To maintain that crispy texture, place them in a single layer in an airtight container. Want to prepare for a busy week? Feel free to freeze them for up to 3 months! To reheat, just pop them in the oven to retain the crunch. Nobody likes sad, soggy chicken!
Tips to Make Gluten Free Chicken Tenders
- Pound the tenders lightly for even cooking.
- Experiment with spices—try adding Italian seasoning or cayenne pepper for extra heat!
- If you love a thicker coating, double-dip your chicken by repeating the egg and breadcrumb steps.
- A splash of lemon juice in the egg mixture can brighten the flavors.
- Don’t skip the paper towels; they soak up that pesky excess oil.
Variations
Feeling adventurous? You could easily switch up the flavors! For a spicy twist, add chili powder to the flour mix. Want to make it vegan? Swap the chicken tenders for tofu or tempeh and use a flax egg instead of real eggs. The possibilities are endless!
FAQs
Can I use regular flour instead of gluten-free flour?
If gluten isn’t a concern, go ahead! But this recipe shines with gluten-free flour for those who need it.
Can I make these chicken tenders ahead of time?
Absolutely! You can prepare them and freeze them uncooked, or cook them ahead and reheat.
What’s the best way to reheat leftover tenders?
Use the oven or air fryer for the best results. This keeps them crisp!
📌 Pin this recipe for your next cozy dinner night!
Gluten Free Chicken Tenders
Ingredients
Method
- In a shallow bowl, combine gluten-free flour, garlic powder, paprika, salt, and black pepper.
- In a separate bowl, beat the eggs until smooth.
- Place gluten-free breadcrumbs in a third bowl.
- Dip each chicken tender first into the flour mixture, then into the beaten eggs, and finally coat with the breadcrumbs.
- Heat oil in a skillet over medium heat.
- Fry the chicken tenders for 3-4 minutes on each side or until golden brown and cooked through.
- Place cooked tenders on a paper towel-lined plate to drain excess oil.
- Serve hot with your favorite dipping sauce.