Craving a Treat with a Crunch?
Let’s be honest here: nothing beats biting into a homemade ice cream cone. It’s crispy, lightly sweet, and totally heavenly when filled with your favorite creamy delight. Gluten Free Ice Cream Cones take this indulgent pleasure to a whole new level, proving that tasty treats don’t have to come with gluten as a side dish. These cones are quick and effortless to whip up, so you’ll be on your way to ice cream heaven in no time!
Why Make This Recipe
Why would you want to make your own ice cream cones? Here are a few reasons that might just convince you:
- Easy Cleanup: One pan, one bowl, and very little fuss — this recipe practically cleans up after itself!
- Family-Friendly Fun: Get the kids involved in making their very own cones. Who doesn’t want to play chef for a day? 😄
- Customization: The recipe is super flexible, so you can make it just how you like.
Ingredients
You don’t need fancy stuff — just these basics!
- 1/2 cup gum-free gluten-free flour
- 1/8 teaspoon xanthan gum (optional)
- 1/8 teaspoon kosher salt
- 3/8 cup granulated sugar
- 2 tablespoons unsalted butter (melted and cooled)
- 1 egg white (at room temperature)
- 1 teaspoon vanilla extract (or 1/2 teaspoon almond extract)
- 2 to 4 tablespoons milk (plus more by the drop, as necessary)
- Coconut oil or butter for greasing the pan
Directions
Follow these steps, and you’ll be rolling cones in no time!
- In a large measuring cup or bowl, combine the flour blend, xanthan gum, salt, and sugar. Whisk until well combined.
- Add the melted butter, vanilla extract, egg white, and 2 tablespoons of milk. Whisk until smooth, adding more milk as needed for a pourable consistency.
- Heat a nonstick pan with coconut oil or butter over medium-low heat.
- Pour about 3 tablespoons of batter into the pan, spreading it into a circle about 5 inches in diameter.
- Cook until the edges are set and starting to brown, about 2 minutes.
- Flip and press gently with a spatula, cooking another minute until golden brown on one side.
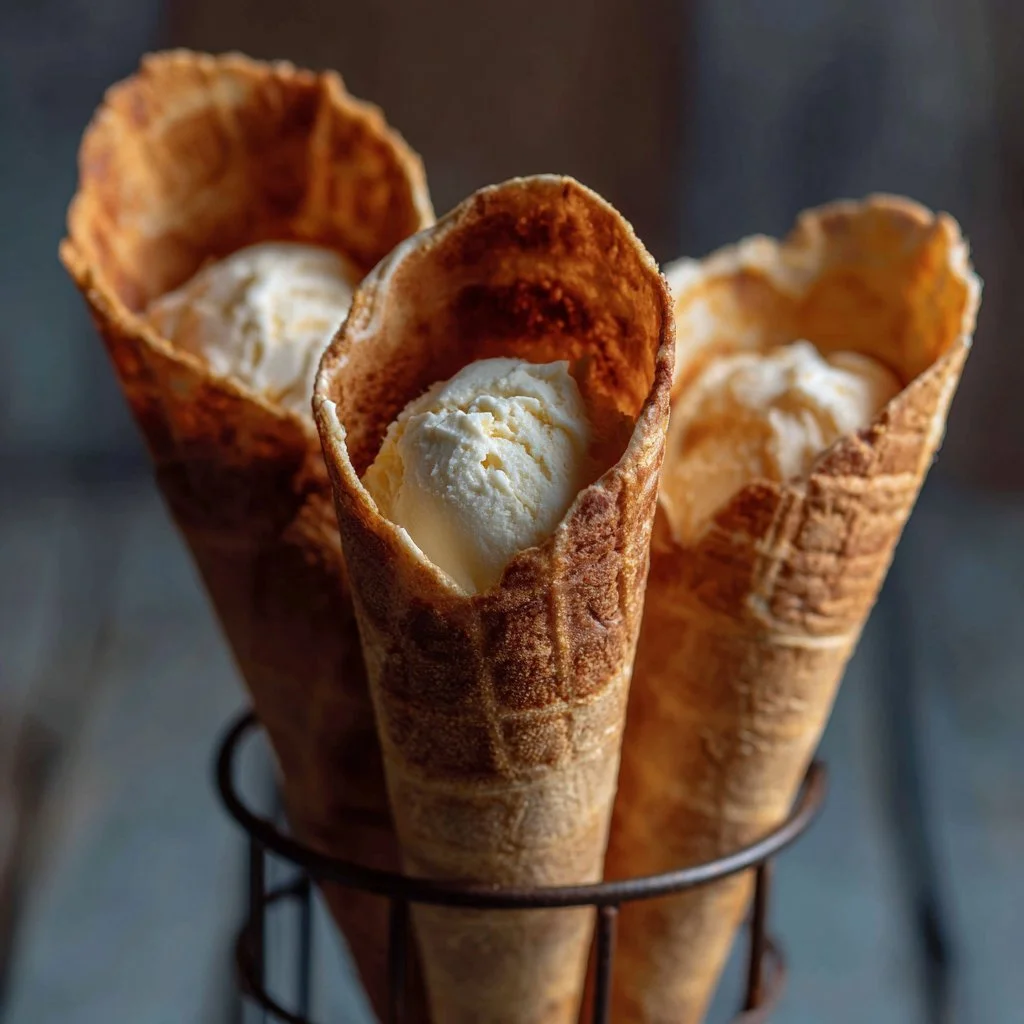
- Remove from the pan and immediately roll into a cone shape, shaping the tip and cinching the bottom shut.
- Cool on a wire rack and repeat with the remaining batter.
- For preventing sogginess, place a mini marshmallow in the bottom of each cone before adding ice cream.
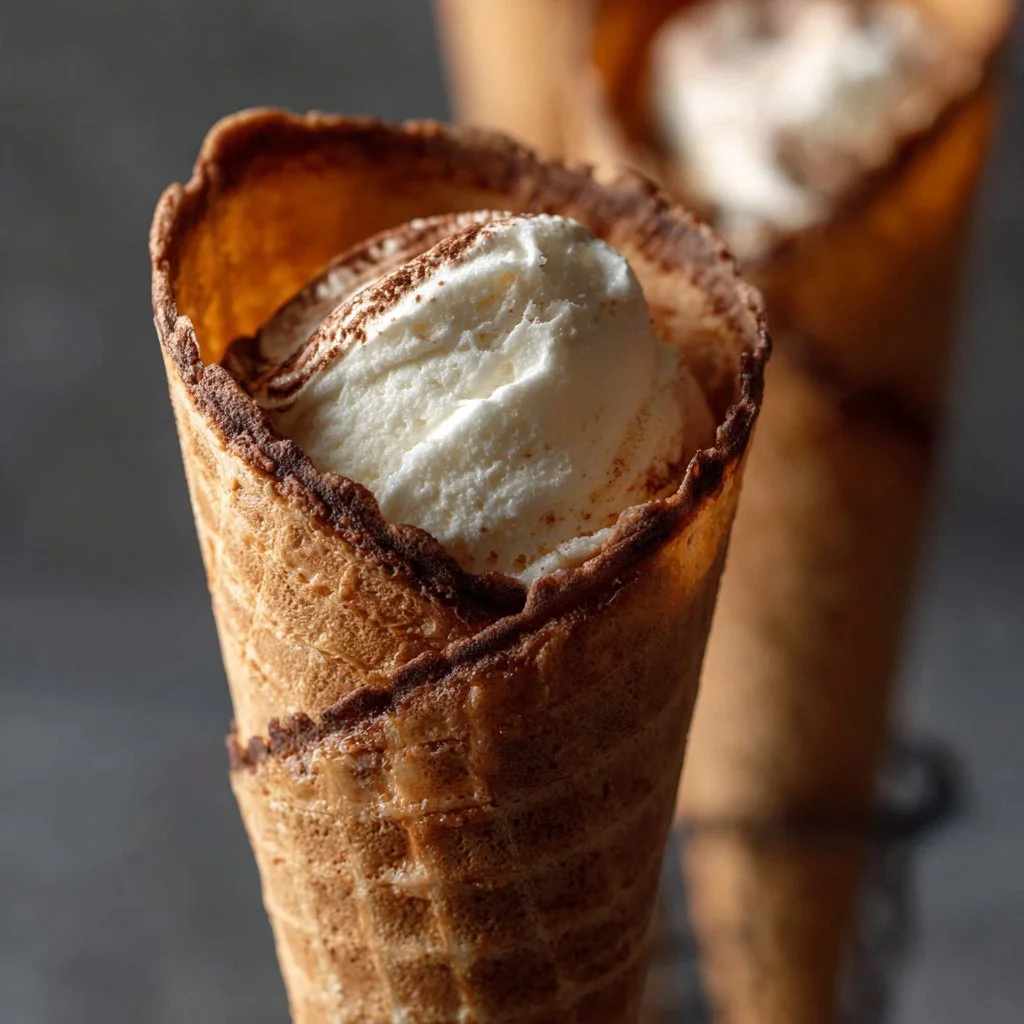
How to Make Gluten Free Ice Cream Cones (Overview)
Picture this: You mix together a handful of ingredients, watch the magic happen in the skillet, and seconds later, you’ve got a cone that’s just waiting to be filled. After a little cooking and rolling, those crispy cones are ready to cradle your favorite ice cream flavors.
Pro Tip: Don’t rush the cooking — you want those crisp edges to form.
How to Serve Gluten Free Ice Cream Cones
Get creative with your serving ideas! Picture bright, colorful scoops of ice cream tumbling over the top of your cones, or drizzle some chocolate sauce while sprinkles rain down like confetti. The aroma of freshly made cones, combined with your chosen ice cream, is a match made in dessert heaven. Plus, there’s that satisfying crunch when you take your first bite. 🤤
How to Store Gluten Free Ice Cream Cones
These cones are best enjoyed fresh. However, if you want to make a batch ahead of time, they can stay crispy in an airtight container at room temperature for a few days. For longer storage, pop them in the freezer, but beware — they can become soft if stored too long.
Reheating tip: Simply toss them in a warm oven for a minute or two before serving, and they’ll regain that delightful crunch!
Tips to Make Gluten Free Ice Cream Cones
- Batter Consistency: Make sure the batter is pourable but not runny; add milk by the drop until you hit the right point.
- Consistent Size: Use a measuring tablespoon to get even cones every time.
- Flavor Boost: Add a pinch of cinnamon or cocoa powder to the batter for a delightful twist!
Variation
Want to spice things up? Try adding cocoa powder for chocolate-flavored cones or citrus zest for a fresh, zesty twist. For a vegan option, swap out the egg white for flaxseed meal mixed with water — it’ll work its magic just the same!
FAQs
1. Can I use regular flour instead?
Not for this gluten-free recipe! Stick to gluten-free flour for that perfect crunch.
2. How can I make these cones vegan?
Substitute the egg white with a mixture of flaxseed meal and water.
3. Can I freeze the cones?
Yes! Just remember they may become soft over time, so try to eat them within a week for best results.
📌 Pin this recipe for your next cozy dinner night!
Gluten Free Ice Cream Cones
Ingredients
Method
- In a large measuring cup or bowl, combine the flour blend, xanthan gum, salt, and sugar. Whisk until well combined.
- Add the melted butter, vanilla extract, egg white, and 2 tablespoons of milk. Whisk until smooth, adding more milk as needed for a pourable consistency.
- Heat a nonstick pan with coconut oil or butter over medium-low heat.
- Pour about 3 tablespoons of batter into the pan, spreading it into a circle about 5 inches in diameter.
- Cook until the edges are set and starting to brown, about 2 minutes.
- Flip and press gently with a spatula, cooking another minute until golden brown on one side.
- Remove from the pan and immediately roll into a cone shape, shaping the tip and cinching the bottom shut.
- Cool on a wire rack and repeat with the remaining batter.