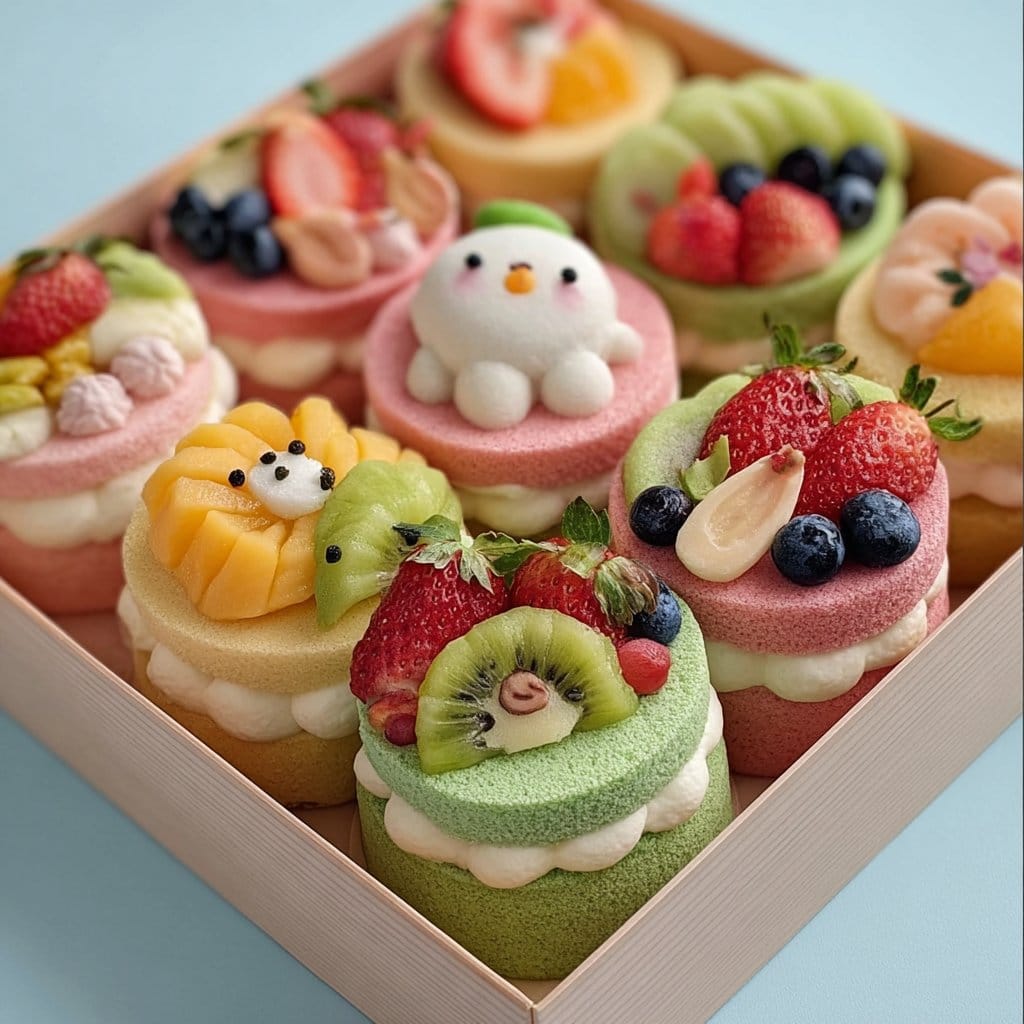
Ever seen a cake that fits perfectly in a lunchbox?
Bento cakes are the delightful mini cakes that have taken the dessert world by storm! These adorable little treats are not only super cute, but they’re also a fantastic way to enjoy cake in a perfectly portioned size. Whether you’re celebrating a birthday or just indulging your sweet tooth, these cakes are a fun twist on the traditional slice.
Why make this recipe
You’ll love bento cakes for a few awesome reasons:
- Easy Cleanup: Who wants to spend hours cleaning up after baking? With bento cakes, you’ve got just one pan to wash. More time for Netflix, right?
- Customizable Fun: You can let your creativity flow with icing and decorations. The kids can help too—just a heads-up, there might be sprinkles everywhere!
- Perfect for Any Occasion: Whether it’s a cozy dinner, a fun lunch, or a spontaneous treat, these cuties fit the bill for all events.
Ingredients
You don’t need fancy stuff — just these basics!
- 1 cup all-purpose flour (or almond flour for gluten-free)
- 1/2 cup granulated sugar (or coconut sugar)
- 1/4 cup unsalted butter, softened (or plant-based butter)
- 1 large egg (or 1/4 cup applesauce)
- 1/3 cup milk (almond or oat milk)
- 1 tsp vanilla extract
- 1 tsp baking powder
- 1/4 tsp salt
Directions
- Preheat your oven to 350°F (175°C) and line a 4-inch round cake pan.
- Cream butter and sugar until light and fluffy (about 3 minutes). Add egg and vanilla, and mix well.
- In a separate bowl, whisk flour, baking powder, and salt. Gradually add the dry mix to the wet mix, alternating with milk. Pour into the prepared pan, smooth the top, and bake for 22–25 minutes. A toothpick should come out with a few moist crumbs (not wet batter!).
- Let the cake cool in the pan for 10 minutes, then move to a rack. Once fully cooled, level the cake top and slice horizontally into 2–3 layers.
- Beat butter until creamy. Add powdered sugar, cream, and vanilla. Beat for 5 minutes. Set aside 1/3 of the frosting for the outer layer; color the rest as desired. Spread frosting between layers and apply a crumb coat. Chill for 15 minutes.
- Apply the final frosting layer. Get creative with piping bags and edible markers. Personalize with colors, names, or designs. Top with sprinkles or berries if desired.
How to make Bento Cakes (Overview)
Making bento cakes is like reaching into your childhood joy box. It starts with whipping up a simple batter that smells divine as it bakes. Then, you layer on a fluffy frosting that makes your heart skip a beat. Pro tip: Chill that cake before frosting it! It makes things so much easier and keeps your layers looking fabulous.
How to serve Bento Cakes
These cakes are as charming to look at as they are delicious to eat. Pipe some fun designs on top, sprinkle with colorful toppings, and get ready for the compliments! Pair them with a scoop of vanilla ice cream on the side for a dreamy contrast—just thinking about it makes me smile. Who can resist a rainbow of colors and textures in every bite? 🎉
How to store Bento Cakes
Bento cakes keep well in the fridge for about 3-4 days. If you have leftovers (which is unlikely, let’s be honest), just pop them in an airtight container. Want to enjoy them later? They freeze nicely for up to a month. Just thaw in the fridge overnight, and they’re good as new!
Tips to make Bento Cakes
- Timing is everything: Make sure your butter is at room temperature for easy creaming.
- Ingredient Swaps: Need it vegan? Substitute the egg with applesauce and use plant-based butter.
- Keep layers level by using a serrated knife; it’ll make icing much simpler.
- Want more flavor? Try adding zest from a lemon or orange to the batter for a refreshing twist.
- Don’t skimp on chilling; it keeps your frosting smooth and not a melted mess! 😄
Variation
Feeling adventurous? Switch up the flavors! Try adding cocoa powder for a chocolate bento cake, or mix in some crushed fruits for a fruity twist. The possibilities are endless; just think about what your taste buds crave—don’t worry, they’ll thank you!
FAQs
Can I make this cake gluten-free?
Absolutely! Just swap in almond flour or your favorite gluten-free blend; it should work like a charm.How can I make-ahead?
You can bake the layers a day ahead, frost them the next day, and voilà—homemade goodness without the last-minute rush!What’s the best way to store leftovers?
Keep them in an airtight container in the fridge for up to 4 days. You could even freeze them if you want to stretch the shelf life!
📌 Pin this recipe for your next cozy dinner night!

Bento Cakes
Ingredients
Method
- Preheat your oven to 350°F (175°C) and line a 4-inch round cake pan.
- Cream butter and sugar until light and fluffy (about 3 minutes). Add egg and vanilla, and mix well.
- In a separate bowl, whisk flour, baking powder, and salt. Gradually add the dry mix to the wet mix, alternating with milk.
- Pour into the prepared pan, smooth the top, and bake for 22–25 minutes. A toothpick should come out with a few moist crumbs.
- Let the cake cool in the pan for 10 minutes, then move to a rack. Once fully cooled, level the cake top and slice horizontally into 2–3 layers.
- Beat butter until creamy. Add powdered sugar, cream, and vanilla. Beat for 5 minutes.
- Set aside 1/3 of the frosting for the outer layer; color the rest as desired.
- Spread frosting between layers and apply a crumb coat. Chill for 15 minutes.
- Apply the final frosting layer. Get creative with piping bags and edible markers. Personalize with colors, names, or designs.
- Top with sprinkles or berries if desired.